Hey there, Soil Analysis Instruments
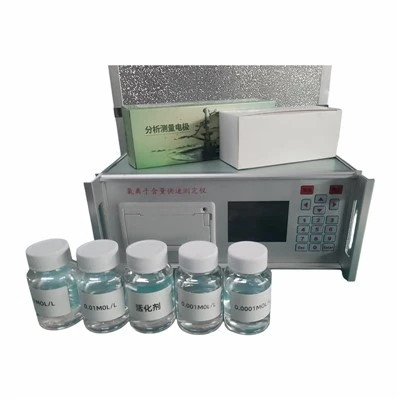
If you’ve ever stared at a tray of half-prepped soil samples in a lab, fumbling to pick the right container before a batch run on your elemental analyzer or pH meter, you know: one wrong choice here and you’re looking at skewed nutrient readings, contaminated samples, or even pieces of plastic melting on a hot digestion block. I’ve been on this side of the lab for the last 12 years—running repairs for soil analysis instruments, helping agronomists and small lab managers troubleshoot, and listening to them vent about sample mix-ups more times than I can count. Today, we’re breaking down how to pick the right soil sample container, not just as a spec sheet bullet point, but based on real stuff I’ve seen go wrong in the field and lab.
First, let’s get one thing straight: soil analysis isn’t just “dig a hole, grab dirt.” It’s precision work. A soil sample container isn’t just a plastic cup to hold your dirt between collection and loading into your instrument. It’s the barrier between your sample and every variable that can change its composition before it gets scanned, tested, or digested. That means every part—material, size, closure, even surface texture—matters, and picking the wrong one can ruin weeks of fieldwork and cost you hundreds in wasted reagents.
Let’s start with the biggest decision: material. This is where most people mess up, and I’ve seen it so often I could write a horror story about it.
I once got a frantic call from a small test lab in Iowa that did corn and soybean nutrient testing for 20 local farms. They’d been using cheap, thin polystyrene containers for their extractable phosphorus tests. When they ran their first batch after switching suppliers, every sample came back with phosphorus levels 30% higher than usual. They thought their ICP-OES instrument was malfunctioning, called me in to calibrate it, checked the standards—nothing was off. Turns out, the polystyrene was leaching trace phosphorus as the soil extract sat in it. The lab had to reprocess 120 samples, and a few farmers got their results delayed, which meant they missed the window for fall fertilizer applications. That’s the kind of mistake that doesn’t just annoy people—it hits their wallet.
So what materials work? Let’s go through the main ones, and when to pick each:
-
Polypropylene (PP): This is my go-to 9 times out of 10. It’s stable, doesn’t leach common analytes (phosphorus, potassium, heavy metals like lead or cadmium), can handle most digestion temperatures (up to 120°C, which covers almost all hot block digestions for soil). It’s also flexible, which matters if you’re handling wet or crumbly soil samples—you don’t want a brittle container cracking in your sample bag. The only downside? PP is semi-translucent, so if you’re testing for soil organic matter via visible light spectroscopy, that slight translucency can cause a tiny amount of light scattering. For most routine tests (pH, cation exchange capacity, macronutrient levels), PP is perfect. It’s also cheap, durable, and comes in standard sizes that fit almost all auto-samplers on mid-range and entry-level soil analysis instruments.
-
Borosilicate Glass: This is the way to go if you’re doing spectroscopic tests that rely on light—visible, UV, or near-infrared (NIR). Glass is totally transparent, so no light scattering, which means your NIR readings for organic carbon or soil texture are accurate. It’s also resistant to acids that PP might pick up over repeated use (if you’re running high volumes of acid digests, glass won’t scratch or leach like PP can). The catch here is that glass is heavier, can crack if dropped on concrete (a super common field mistake), and is more prone to breaking during high-temperature ashing (if you’re testing total organic carbon via dry combustion). Also, glass can leach boron in some cases, which is a problem if you’re testing for soil boron levels. So save glass for spectroscopic or dry combustion tests, not for boron analysis.
-
Low-Density Polyethylene (LDPE): LDPE is great for field collection, but not so great for lab storage. It’s cheap, flexible, and doesn’t scratch when you’re shoveling wet soil into it, which makes it ideal for primary sample collection (before you transfer the subsample to a lab container). But LDPE is more permeable to gases and moisture than PP. If you leave a soil sample in LDPE for more than a few days, you might lose volatile compounds (like nitrogen as ammonia) or absorb moisture from the air, which skews moisture content tests or ammonia levels. Stick to LDPE for collection, and transfer to PP or glass right when you get back to the lab.
Now, size. This is another area where I’ve seen labs waste time and money. A lot of people grab whatever container is in the supply closet, but size is tied directly to your instrument’s auto-sampler. If your auto-sampler has a 20mm diameter well, a 15mm wide container won’t sit right, and the robot arm will either miss it or crack it when loading. If you use a container that’s too tall, it might hit the lid of the auto-sampler, leading to jammed runs that take an hour to clear (and trust me, that’s a whole day of lost productivity for a busy lab).
Also, size ties to sample quantity. For a standard routine soil test, you only need 5-10 grams of air-dried soil. If you pick a container that holds 50 grams, you’re using more plastic (or glass) than you need, and wasting lab space in the auto-sampler tray. Conversely, if you’re doing a digestion that requires 25 grams of soil (for heavy metal testing, for example), a small 10mm diameter container won’t hold enough, and you’ll have to split the sample, leading to higher error. My rule of thumb: match the container size to the instrument’s auto-sampler well size, not just the amount of sample. If your auto-sampler uses 20mm x 50mm containers, that’s your baseline for most tests. For heavy metal testing, size up to 20mm x 75mm to hold the extra sample and reagents without spilling during digestion.
Closure is the most overlooked part, in my opinion. A lot of people think a snap-on lid is enough, but let’s talk about what makes a good lid. First, it needs to be airtight. If you’re storing samples overnight, or shipping them to a third-party lab, an airtight lid prevents moisture loss (which changes moisture content calculations) and contamination from other samples. I once had a lab mix up a lead sample with a cadmium sample because they used lids that didn’t seal—fine particles blew out of one container and into the adjacent one, leading to a full re-test. That was avoidable.
Second, the lid needs to be compatible with your instrument. Many auto-samplers read the barcode on the lid to track samples, so if you use a lid that’s too thick, or a barcode that’s not the standard size, the instrument won’t scan it. Also, some digestion blocks require the lid to withstand high pressure—low-quality snap-on lids might pop off at 100°C, spilling hot acid and soil all over the instrument (and the lab tech). Look for lids with a silicone or EPDM gasket (ethylene propylene diene monomer) for a tight seal, and make sure they’re rated for the highest temperature your digestion will reach.
Now, let’s talk about special cases, because not every test is routine. If you’re testing for volatile organic compounds (VOCs) in soil—like petroleum hydrocarbons from a gas station leak—you can’t use PP or glass. Those materials are porous, so VOCs will adsorb to the container walls or leach into them, leading to false low readings. For VOC testing, you need pre-baked stainless steel containers with PTFE-lined lids. They’re non-porous, don’t adsorb VOCs, and can be baked at high temperatures between samples to eliminate cross-contamination. I’ve also seen labs use these for freeze-dried soil samples, since they don’t absorb moisture the way plastic does.
If you’re doing microbial testing—counting soil bacteria or fungi—stay away from any container that’s been touched by human hands or has residual cleaning agents. PP is okay, but it needs to be gamma-irradiated or autoclaved before use. Glass is fine too, as long as it’s acid-washed and free of any detergents. Never use containers that have been used for heavy metal testing for microbial work—there will be residual metal, and that will kill the microbes.
Another common question: can I reuse containers? Short answer: only if you follow strict cleaning protocols. PP can be reused if you soak it in 10% nitric acid for 24 hours, rinse with deionized water, and bake at 105°C for 2 hours. Glass is more durable, but the same cleaning rule applies. The only time you can’t reuse is for VOC or microbial testing—those are single-use, because even the best cleaning won’t remove residual compounds or microbes. I’ve seen labs save a few bucks by reusing contaminated containers, and it cost them $2,000 in lost samples and instrument downtime. Not worth it.
Now, let’s tie this back to your soil analysis instruments, because that’s what we’re all here for. Every auto-sampler, digestion block, and spectrometer is calibrated to work with specific container dimensions. If you use a non-standard container, you’re adding variables that your instrument wasn’t designed to handle, which means your results will be less precise. A lot of instrument suppliers (including the ones I work with) don’t just sell you the hardware—they carry compatible containers tested specifically for that instrument line. Those aren’t just overpriced accessories; they’re calibrated to fit the auto-sampler, seal properly for digestion, and not leach any analytes.
I’ll wrap this up with a quick checklist I keep taped to my desk for lab techs and field collectors. It’s simple, but it’s saved so many headaches:
- Pick material based on your test: PP for routine nutrients, glass for NIR/VIS spectroscopy, stainless steel for VOCs.
- Match size to your instrument’s auto-sampler well (not just sample amount).
- Choose lids with a gasket for airtight seals, rated for your digestion temperature.
- Reuse only if you follow nitric acid soak + deionized rinse + bake protocol.
- If your test is for VOCs or microbes, use single-use, pre-treated containers.
At the end of the day, the right soil sample container isn’t about the most expensive or fanciest one—it’s about the one that doesn’t interfere with your sample, fits your instrument, and keeps your results accurate. I’ve helped hundreds of labs swap out the wrong containers and cut their sample error rate by 20% or more, and that’s the kind of difference that matters when you’re advising farmers on fertilizer or cleaning up environmental sites.
Laboratory Instruments If you’re working on a new lab setup, upgrading your instrument, or dealing with recurring sample issues because of containers, reach out to us. We’ll help you match the right containers to your specific soil analysis instruments and testing needs, no generic recommendations—just what works for your workflow.
References
- S. J. Birrell, "Soil Sample Container Selection for Nutrient and Contaminant Analysis," Journal of Environmental Quality, vol. 32, no. 4, pp. 1212-1218, 2003.
- American Society of Agronomy, "Soil Sampling and Preparation Guidelines," Agronomy Monograph no. 18, 2020.
- T. E. Sauer, "Material Leaching from Sample Containers and Its Impact on Soil Phosphorus Testing," Soil Science Society of America Journal, vol. 71, no. 3, pp. 987-992, 2007.
- U.S. Environmental Protection Agency, "Field Sampling Guidance for Volatile Organic Compounds in Soil," EPA Method 5030, 2014.
Hebei Wanluda Testing Instrument Equipment Co., Ltd.
As one of the most professional soil analysis instruments manufacturers and suppliers in China, we have world-leading production equipment and strong manufacturing capabilities. Please rest assured to buy advanced soil analysis instruments made in China here from our factory.
Address: Zhouguantun Village, Xian County, Cangzhou City, Hebei Province, P.R.China
E-mail: wldinstrument@163.com
WebSite: https://www.wldinstrument.com/
